Measuring the Cable Length
When undertaking a project involving tree cabling and bracing, accurately measuring the cable length is crucial for successful installation. Begin by assessing the distance between the branches that require support. Consider the height of the tree and the angle at which the cable will extend. Using a measuring tape, gauge the length needed, ensuring that you account for any slack that may be necessary to allow for tree movement over time.
It is also important to consider the thickness of the cable itself when measuring. Thicker cables may take up more space, necessitating a slightly longer measurement to accommodate the desired tension and stability. Additionally, consider any potential points of attachment, as these may alter the final length needed. Proper measurement lays the foundation for effective tree cabling and bracing, minimizing the risk of failure and enhancing the overall health of the tree.
How to Properly Measure for Your Tree
Measuring for tree cabling involves determining the right length to ensure the cable effectively supports the tree without causing damage. Start by assessing the height of the tree and identifying the points where the cable will be attached. It's important to consider the tree's trunk diameter and branch structures as these factors will influence the necessary cable length. Use a flexible measuring tape to get accurate readings around the tree's trunk or to reach out to branches that require support.
In Tree Cabling and Bracing, it is crucial to avoid putting undue pressure on the tree. When taking measurements, factor in the distance between cable attachment points and any potential movement of branches. Always err on the side of caution by allowing for additional length, ensuring that the cable can accommodate the tree's natural growth and movement over time. This careful planning helps maintain the health of the tree while providing the required stability.
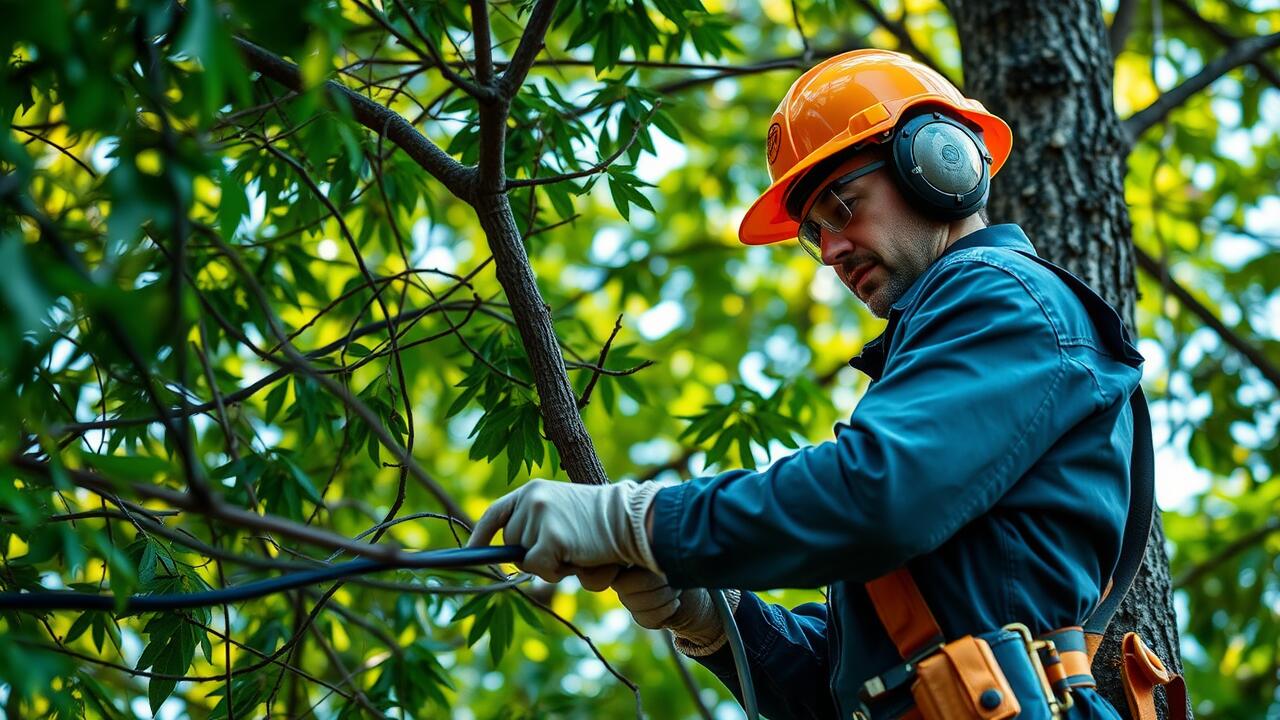
Installing the Cable
Before initiating the installation, ensure that you have all necessary tools and materials. Begin by selecting an appropriate cable designed specifically for tree cabling and bracing. This cable should be strong enough to support the tree while allowing for some natural movement. Position the cable at a level that provides balance and adequate support to the tree, usually 3 to 4 feet above the ground, depending on the size and structure of the tree.
As you secure the cable, loop it through a suitable anchor point on the trunk or main branch. Use protective sleeves to prevent damage to the bark, ensuring that the cable doesn’t cut into the tree. Tighten the cable enough to provide support without restricting the tree's natural growth. Check that the tension is evenly distributed to minimize stress on specific points. This careful installation is crucial for effective tree cabling and bracing, promoting stability and health for your tree.
Step-by-Step Installation Process
Begin by choosing the right spot for the cable installation. Select a robust branch that is at least one-third the way up the tree. This branch should be healthy and free from decay. Position the cable in such a way that it effectively supports the tree during adverse weather conditions. Use a cable that is specifically designed for tree cabling and bracing, ensuring it has the correct weight capacity based on the tree’s size.
Once the location is determined, drill a pilot hole into the selected branch. The hole should be slightly smaller than the diameter of the cable hardware you plan to use. Insert the bolt or hardware into the pilot hole, making sure it is secure and firmly anchored. Follow this by attaching the cable to the bolt or hardware, ensuring there is enough tension without putting excessive stress on the branch. Finish by inspecting all connections for stability before moving on to securing the cable more permanently.
Securing the Cable
Securing the cable is a crucial step in the tree cabling and bracing process. Begin by checking that the cable is properly positioned at the recommended attachment point on the tree. Use a reliable tensioning system to ensure that the cable is neither too loose nor too tight. The right tension can provide stability without damaging the tree or causing undue stress. Double-check the connections to make sure they are secure, as loose fittings can lead to failures.
After setting the correct tension, use appropriate protective hardware, such as rubber or plastic cable sleeves, to prevent wear on the tree bark. This added layer of protection helps minimize injury to the tree and extends the lifespan of your cabling setup. Regularly inspect the cable for signs of wear or loosening over time. Ongoing maintenance is essential for ensuring that your tree remains healthy while benefiting from the support of tree cabling and bracing.
Techniques for Ensuring Stability
Stability is critical when it comes to Tree Cabling and Bracing. A properly tensioned cable will help mitigate the risk of limb failure or whole tree collapse. Use the appropriate cable size and material, ensuring that all components are rated for the specific load they will bear. Regular inspections should be conducted after installation to assess the condition of both the cable and the tree. Adjustments may be necessary as the tree grows and the dynamic forces acting upon it change.
In addition to the correct hardware, securing the cable at the right points is essential for balancing support and flexibility. Generally, the cable should be attached to the main trunk or primary limbs rather than secondary branches, which may not provide adequate support. Consider incorporating additional bracing materials like tree wraps or cushions at the connection points. This can minimize damage and promote even distribution of stress.
FAQS
What is a tree cable, and why would I need one?
A tree cable is a support system used to stabilize branches or trunk splits in a tree. It helps prevent damage during storms or high winds and is often used to protect both the tree and surrounding property.
How do I determine the appropriate cable length for my tree?
To determine the appropriate cable length, measure the distance from the point where the cable will attach to the tree to the point where it will anchor to a supporting structure or another tree. Add extra length for the knots and securing methods.
Can I install a tree cable myself, or do I need a professional?
While you can install a tree cable yourself if you have the right tools and knowledge, hiring a professional arborist is recommended for optimal safety and effectiveness, especially for larger or more complex trees.
What tools do I need for installing a tree cable?
You will need tools such as a tape measure, a drill with bits (if you need to install hardware), a cable clamp, a wrench, and possibly a ladder for reaching high branches. Safety equipment like gloves and goggles is also important.
How can I ensure the cable remains secure over time?
To ensure the cable remains secure, regularly check for signs of wear, rust, or loosening. It’s also important to use high-quality materials and proper installation techniques, such as secure knots and appropriate anchoring methods.